Monday, 13 June 2011

A featured lipstick case!

I am so proud and happy!
One of my lipstick cases is the bag of the week on "Carried away: the etsy bag makers team blog"!

Here is the link. 
Kristien

Wednesday, 8 June 2011

A shopping bag with a retro touch - Part 2

Now, lets move on to the outer bag.
I wanted my bag to be sturdy and able to stand on its own.
I used Vilene S 520 as reinforcement. This is a firm and fusible interfacing.

I cut this S520 1 cm smaller than the pattern, all around. This makes stitching and turning the bag easier and gives seams which are less bulky.
I fused it to the wrong side of the exterior fabric and added a layer of Vilene H 250 interfacing on top (using the complete pattern). Now I will have a bag with structure!
Next, I stitched the 2 side panels together, WSO, along the side seam.
Then it was a challenge to attach the base of the bag to the side panels.  This was probably due to the Vilene S520  attached to the base piece. Even when basted by hand and using the zipper foot, the 2 pieces slipped away. In the end I got a reasonable result. Next time , I will try another method.
I added purse feet to protect the base.


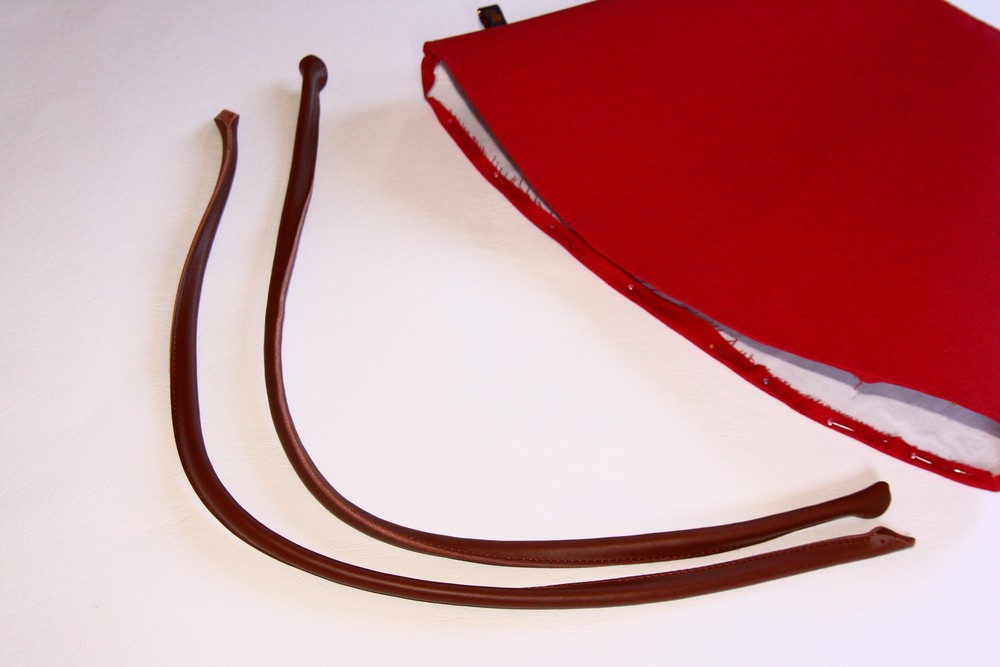
I attached the leather handles to the outer bag  by hand  , using quilting thread.
My outer bag was ready!
All there was left to do is bringing the lining and outer bag together.
I inserted the lining bag, with top edge folded down,   in the outer bag , also with a folded top edge. Both wrong sides should be facing each other. 
I carefully matched and pinned the top edges and topstitched all around, including my strap with key-hook.
As a finishing touch, I added a lovely ribbon trim.
This picture represents best the real colour of the bag.
Here is the end result:


A bag with a sea of space!
Looking back at the picture of the bag , from which I took the pattern; you see that depending on the choice of fabric, interfacing and embellishments, you get a totally different bag.
I love this one.
Kristien

Thursday, 2 June 2011

A shopping bag with a retro touch - Part 1

My mam asked me to make "a red bag" for her.
I thought of making one of the bags out of the Japanese book, of which I told you in my previous post.
I took the pattern of this bag as a base:
This is a very simple, basic bag, with a  base and 2 side panels.
Although I can't read japanese, I didn't need the instructions. Also the pictures are clear.
I increased the size of the pattern with 1 cm, all around the outside of the pattern pieces and increased the height of the bag with 3 cm.
Apart from that, I added a strap with key hook , a hidden pocket closed by a zipper and I used leather bag handles.
First , I made the pocket. I used the instructions out of Lisa Lam's "Bag making bible".
If you don't have the book , there is a good tutorial on her blog: the zippered inner bag tutorial.
Here are some pictures. It is really easy to make this pocket.
 This is the back of the pocket fabric
I always use my embroidery scissors to do the fine cutting work.
 This is the front of the lining fabric, the pocket fabric has been pulled through.
 The stitched zipper from the back.
Once the second pocket piece was added, you get this view.
Now, one of the lining pieces has a zippered pocket.
Then I stitched both side lining pieces together, Wrong side out (WSO).
Once this was done, I attached the base of the bag, with the right sides facing each other
For the strap , I took a piece of interfaced fabric; 4 cm wide and a few cm longer than the height of the bag.
I folded the strap in half along the length, opened it , folded the long edges to the crease and folded again along the center crease. The strap will be 1 cm wide. I closed one of the short ends by folding the fabric inside. I threaded the D-ring of the key hook onto the strap and topstitched along both sides of the strap.
This is the result:

The lining bag is ready.
Now, it is time for the outer bag.
More about that in my next post.
Kristien

Tuesday, 31 May 2011

Making a bag... in Japanese

Recently, I found this book at 'Cottonpatch'.
I have no idea what the title means. Perhaps someone can help ?
I was attracted to some of the projects.
Luckily the pictures in the book clearly demonstrate what to do and I am not a novice in bagmaking.
I am planning to try one of the projects.
I will let you know how I get on.
Some pictures:


Kristien

Saturday, 21 May 2011

A small coin purse : a (late) Mother's day Present

I know; mother's day (8th of May in Belgium) is long gone; but I promised my mother a little present. 
I just couldn't finish it in time.
It has been very hectic here.
My cleaning lady left and I found out it is very difficult to find a GOOD replacement.
So, since 2 months I have to be a supermam: cleaning our big house, working part-time, washing, ironing, weekly food shopping, bringing the children to their music classes after school, playing the clarinet...

You see, there is hardly any time and energy left for sewing and blogging.
But hopefully, next week help will be on its way.
At last , I managed to finish this cute little coin purse.
It could also be used to carry a lipstick and a small mirror.
I used "the zippy wallet" tutorial from Noodlehead, as a base but adapted it a little bit.
I took a smaller zipper: for my fabric piece of 12.5 cm (5") I used a 10 cm zipper . I attached 2 small fabric pieces for the topcorners of the purse like this:
and I always topstitch along the zipper. 
This gives a professional finish.
Have a look:
Here is the final result:

What do you think?
Kristien
Related Posts Plugin for WordPress, Blogger...