Saturday, 6 August 2011

An expensive mannequin

Two weeks ago, during our brief stay in Switzerland, I fell in love with this mannequin in an antique shop.
It is a vintage mannequin, but newly decoupaged with magazine pictures.The price:..... more than 1800 Swiss Francs!!! (> 1650€; > 2350 $; > 1450 £)
The Lady shopkeeper said it was so expensive because of all the work it took to make her look like this.
I thought this was way over the top and far to expensive. I was a bit sad  to have to leave this girl behind.
But it made me realise we shouldn't underestimate the value of our quality handmade work and charge appropiately for the materials we use and the time we spend in constructing our work of art.

"The handmade marketplace" by Karin Chapin (I bought it here) is a useful little book with lots of advice about selling your crafts. 
She uses the 2.5 formula to determine the retail price of your work:
multiply the basic costs (materials, shipping envelop, postage...) with 2.5 and consider that your retail price.

Meanwhile , I am looking out for another mannequin friend.
Enjoy your weekend.
Kristien


Wednesday, 3 August 2011

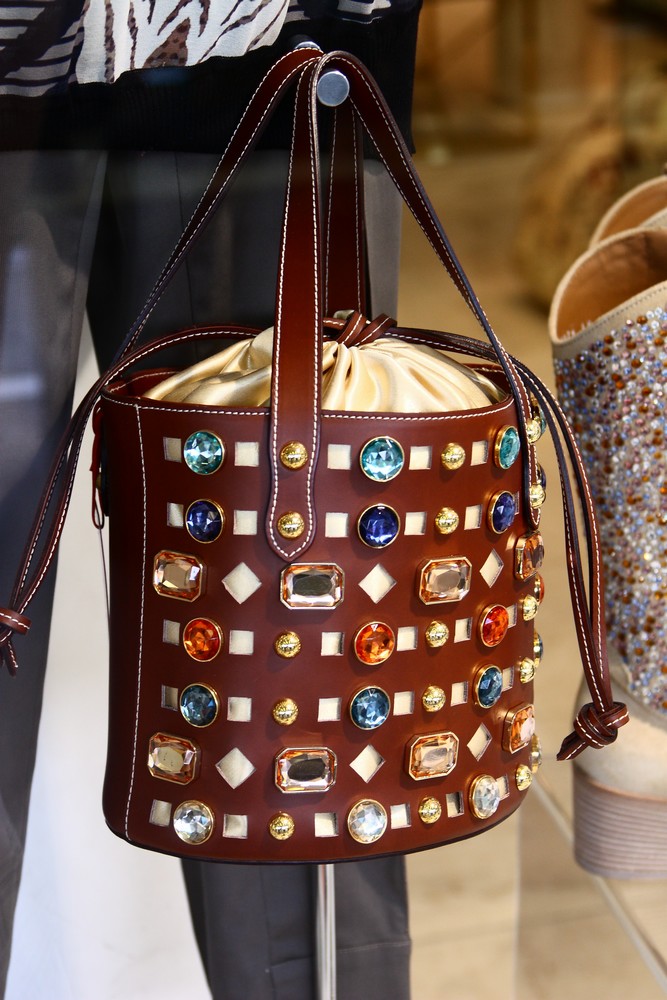
Bags,bags, bags...

During our holidays , I did some window shopping with my camera.
Have a look at the beauties I saw:


Enjoy...
Kristien

Sunday, 17 July 2011

On holiday with my Great Getaway Bag.

A few weeks ago , I was dreaming of the holidays.
As I came across The great getaway bag project in Lisa Lam's Bag making bible, I decided to make this bag, to take with me on holiday.
It is not a difficult project, but it takes some time.
Here is my bag:

 I found the exterior  fabric in the sale section of my local fabric shop. It gives a beautiful 3D effect.
The lining is an Amy Butler Home Dec fabric, out of the Soul Blossoms collection . (Night tree in lime peel)
I will guide you through my "making of", once I get back.
For now...
Kristien

Sunday, 3 July 2011

My Key keeper Coin Purse - Part 2

The exterior and lining panels are ready.
Now it is time to install the zipper.
The zipper I bought was too short. This should not be a problem.
I solved it this way:
You can give your zipper the length you want, by adding a small piece of fabric on each side.
Put the piece of fabric on the zipper, RS together and stitch close to where the zipper teeth end.
Fold the fabric over and topstitch (left side of picture)
Then I placed my finished fabric-zipper face down on the right side of an exterior panel, like explained in the book on p.97.
Follow the book and you get this:
I flipped lining and exterior over, so that  the wrong sides were matching. Here , I am topstitching across the top of an exterior band, starting and stopping 1 cm from each edge.
I didn't have to trim my zipper.
I repeated everything for the other side of the zipper:
Here, the zipper is placed face down on the 2nd exterior panel.
Here, the 2 sides are topstitched; lining and exterior are facing each other WS together.

Then, I made and attached the tab:

To finish, following step 11 on p. 98, I separated lining and exterior from each other. I placed the 2 exterior pieces RS together, as well as the lining pieces.
Do not forget to leave the zipper open, or it will be very difficult to open it once exterior and lining are stitched. The zipperpull will be on the inside.
Step 11 is very clearly explained.
At the top you can see the opening in the lining, necessary for turning the purse RS out.
I turned it through the opening and closed the gap in the lining by hand.
Finished!
Have a look.
I prefer this zipper finish.

 It holds my lipstick, lipgloss, little mirror, USB stick, handbag hook..
I love my little purse
Kristien

Saturday, 25 June 2011

My Key keeper Coin Purse - Part 1

Is the bottom of your handbag also a mess?
To make it easier to find my lipstick, mirror etc, I made the little purse out of Amy Butler's recent book: Style Stitches.
My fabric choice: for the exterior panel I used Ephemeral Antiquity from Michael Miller fabrics; the fabric for the band is from the paradise collection from Artgallery fabrics and for the lining I used a soft pink Liberty fabric, which is no longer available I think.
I started with the exterior part.
In step 4 on p. 96 I stitched only 1 cm from the folded edge, because I always use a 1 cm seam allowance. So, this way I was shure the band would fit properly.

The panel is folded in half RS together and stitched 2.5 cm down, 1 cm from the folded edge.
 Here , the band is placed on the main panel, RS together.
After edge stitching.
I made the second exterior panel in a similar way.
Then I constructed the lining in the same way , but added a pleat on the bottom edge as advised. The pocket was easy to make and basted to one of the main lining panels.
Here is the result:
 The main parts are now ready to be assembled, with a zipper in between.
More about that in my next post.
Enjoy the weekend.
Kristien
Related Posts Plugin for WordPress, Blogger...