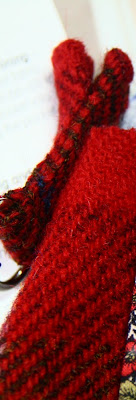
I used a William Morris print by Fabric Freedom; a lovely, matching fabric;
At first, it looks difficult to make and insert the pocket, but it isn't.
The tutorial on p.66-69 is very easy ; just follow it step by step.
I used an 18 cm zipper and didn't trim it .
I interfaced the pocket fabric to reinforce it.
As I didn't have double sided tape, I carefully pinned the bag fabric to the zip along the sides of the rectangular hole.
Then, with my zipper foot, I stitched around the zipper.
You get this neat, clean result:
This is the back of your pocket:
I sewed the darts on the lining
and stitched both parts of the lining together, making sure they matched exactly at the darts.
Then came the bag exterior:
I first inserted the twist lock button to one part of the bag exterior following step 2 on p. 92. This is easy.
I sewed the darts like I did on the lining
Then it is advised (step 6) to stitch the shoulder strap loops to the outside of the bag.
I didn't like the result; this wasn't the perfect finish I wanted, so I put the small straps at the side seam between outer bag and lining. This is in fact much easier to do and give the straps a stronger hold.
Follow me, I will show you how.
First, I assembled the exterior bag, by completely stitching both pieces together, matching the darts.
Next, I put the shoulder strap loops with bold snaps upside down at the top of the side seam on the outside of the exterior and stitched it in place with a 5 mm seam:
It is not a perfect picture, but I hope you understand what I mean. Once the lining and exterior are assembled, it will be clear where this strap will be.
The last part of the bag is the flap. Step 10 on p.98 explains clearly what to do. Topstitch slowly to get a good result. I always use a topstitch needle and quilting tread for topstitching ; it is stronger and thicker than the usual threads.
Finally I inserted the twist lock front plate. As mine wasn't a screw on plate, I preferred to do it following a tutorial from Nicole Mallalieu. I talked about this in a previous post, here is the link.
All that is left to do now is to assemble lining, exterior and flap, insert the eyelets and attach the handles.
To be continued..
Kristien


I'm just going to start this bag, wish me luck!! I have just finished the Multi-tasking tote bag, I'm very pleased with how it turned out, and I learnt a lot from making it.
ReplyDeleteGood luck! It is a great bag to use.
ReplyDeleteDo you use another fabric?
No, I bought the same fabric as you, I liked it so much in the book.
ReplyDeleteHello, I see these posts are from 2011, but I hope you can help me. I bought Lisa's book and started making the Oversized Fashionista Bag, but Step 6 has "thrown me for a loop" so to speak, and the referenced pictur does no make it clear where to put the shoulder strap loops. So, I sewed the outer bag together, leaving the 5 and 1/8 inches at the top open (as it says) but I have no idea where to put the strap loops. Can you show me a picture of where you put them? Thank you so much. My email is: terikrueger@gmail.com
ReplyDelete